I want you to assess your images in your shop or blog. I know you work hard to create your products. Even though you have to wear many business hats today it’s your photographer’s hat we are wearing. The process of adding images to your blog can be quick and simple, however, this sometimes quick task is the one that often gets overlooked. It’s also this task ‘the image’ that can make that new potential customer ask “To buy or not to buy” or “To read or not to read” – we don’t want either of these questions to arise, so let’s look of dispelling them.
 The Mistakes you may be making with your images
I can’t count the number of times I’ve gone to a site and seen
-
- an image stretched or squashed to fit the gap its in
- an image used in another place like the header but it’s out of focus
- the image is so big it hangs over the content area, the sidebar and even sometimes the edge of the computer screen
- the worse culprit of all is seeing the dreaded dark image, enhanced with shadow and with a touch of low lights
Seriously, I have to stop myself from sending an email to the owners and telling them to take down those images and simply add a little brightness. Why I don’t do it is because getting an email from a total stranger criticizing your work is hard to accept and makes one become defensive. When you look at it from the web owners perspective it’s “I know what I’m doing, and who are you to come tell me any different”.
Therefore because of that negative reaction or feeling undervalued, I choose to share my help here and to those who ask for it. I still feel a little hurt when I have my work criticized but I use it to make my work better. Plus I ask for the feedback because I know it will only make me stronger. As my beautiful mother used to say “What doesn’t kill you makes you stronger“.
The difference between having an alright image to having a great image is everything. Remembering that it’s your image’s job to capture your visitor’s attention whether to read your blog post or sell your products.
After reading the mistakes you might know but just don’t have the means to be able to change the images you are using. It very easy to just take an image and fit it to your needs and put it where you want without a second thought. Also taking the pictures of loads of products, uploading them and adding them to your site only to find that some are not looking their best is not a nice feeling. It’s easy to say I will do it later, but later gets interrupted by all the other tasks you have to complete. I know what you’re going through, I’ve been there and seen the light. Also sometimes the less you have to learn the better right, it’s not like you haven’t got enough on your plate already.
Are you making mistakes with your images that could cost you? Click to Tweet http://clicktotweet.com/zT2OV
The do’s and don’t of getting your images to work for you
Well to make your task of working with images a little easier and quicker I’m sharing some tips and tricks so you don’t have to compromise your content with an image that will not do your site justice. Some of the do’s will work for your blog posts but may not be practical for your product images. Use the tips to help you make your images look great when they do you’ll feel better for it.
Quick Tip: Sort out your images straight away, don’t put off the task, because you will either forget or add more images and that’s when a task becomes too much to bear.
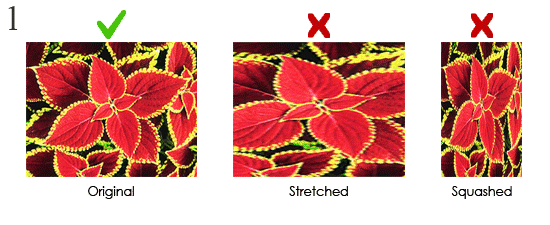
1: Never stretch or squash your image to fit, it looks unprofessional and your visitors will notice it for the wrong reasons.
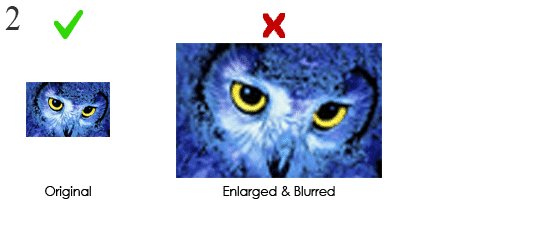
2: Small images are small and stay small. By trying to make the image larger than its original size only makes it looked blurred. Sometimes you will just have to choose another image to take its place, your content will be happier for it.
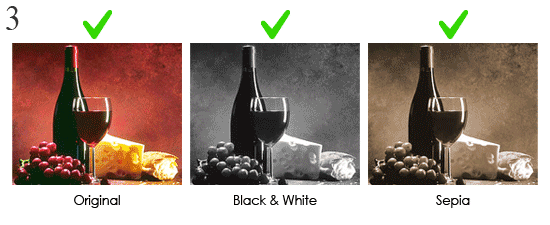
3: You don’t have to settle for the image colours you see, sometimes taking a full-colour image to simply black and white can have a dramatic effect.
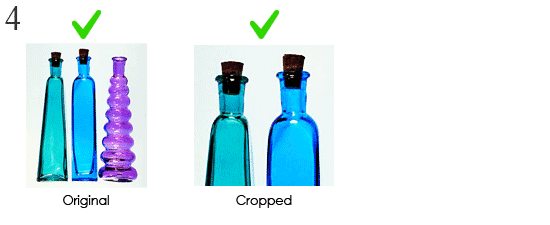
4: Don’t be afraid of cropping down an image, detail can be very powerful and make your image more dramatic.
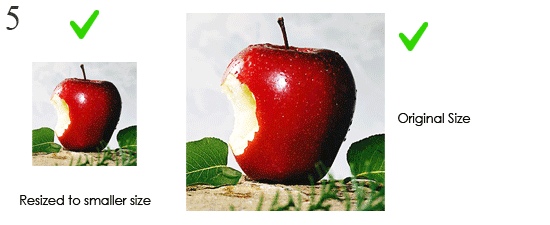
5: Don’t be afraid not to resize the image smaller and just go large. As the saying goes “An image says a thousand words”, well let your image speak volumes. Tip: Even if it’s large still make sure it fits within the space you have and that it does not hangover.
Last but by no means least, I hear you say how can I do all the above. I have not forgotten that not everyone has graphics software at hand. So I have created a list of some online and some offline photo image software that will aid you in getting exactly what you want from your images before you add them to your sites.
These are free downloadable software:
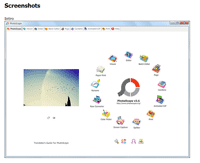
Photoscape
Photoscape is a fun and easy photo editing software that enables you to fix and enhance photos.
Note: You will see a lot of large buttons saying Download, these are for advertising purposes. The real download button to use to actually download the software it located at the top of the page called “Free Download” right next to the “Home “. When you click that lick to next page will show 3 download buttons you can pick anyone, (each button is for a different download site but you will get the same software whichever you choose.)
The Software for Online use:
Open Photo Editor: will give you a choice of 4 options these are:
- Create a new image – You will start with a blank canvas and you can create whatever you want
- Open image from a computer – Browse your computer for the images you want to change
- Open image from URL – You can use the images that you have already online, just by specifying the url
- Open image from the library – You can use images from pixlr, your Facebook or other library but you will have to login to use this option.
Once you have chosen your option you will see your image unless you are starting from scratch. To find all your effects look in the menus called Adjustment & Filter.
Retro Vintage Effects: will give you a choice of 2 options these are:
- Webcam – You can grab a live image using your webcam
- Computer – Find the image you want to work with from your computer
Two way to get started you can either:
Go to the top right of the page where it says “Get Started” here you upload your image or choose a sample image to play with or grab images from other resources.
Look at the bottom half of the page you will see heading such as : Effects, Fonts, Shapes etc..By clicking on ones of these it will take you that part of the software it will give you the option of uploading an image or using a sample image of theirs.

Sites that allow you to resize your images online
